Sunday, November 2, 2014

Polenta with Squash, Herbs, and Parmesan


Our screens are rattling from the wind outside. Slippers? Check. Robe? Check. Coffee? Check.

Good morning, Sunday. Nice to see you.

It is finally the time of year for the "stick-to-your-ribs" type of food.

Can we just talk about polenta for a second? It's gluten free. It's vegan. It's easy. And you can flavor it any way you want. Um, hello, Awesome. It's such a great change from pasta, rice, or couscous. Plus, if you pour it into a ramekin (or a mug) while it's still hot, the polenta will conform to its shape. Friends and family will be like "Ooooo… fancy schmancy". And all you did was pour it from your stovetop into a mold. To us, there is only one way to cook the stuff in the autumn months. And it is from this book: Harvest of Pumpkins & Squash. It is a must for every bookshelf.

Next, let's talk squash. Yes, Butternut Squash is always a favorite. But it should not be the only squash you reach for at the market. Like I mentioned in our last post, there are so many to choose from! Don't be afraid to break the mold and try some random variety. Don't know how to cook it? Ask someone at the store. Or look it up on the internet. You will be surprised and glad you did.

The recipe called for butternut, but we used a red kuri pumpkin. Do you like chestnuts? Then try this squash. It tastes just like chestnuts (and has a similar texture). Added bonus: the color is beyond gorgeous.

Because we used someone else's recipe, we will refrain from posting the method of cooking. (Did you buy this cookbook already?) We will say this much, however: Melting butter (it doesn't have to be a lot, guys) with salt, herbs, and tossing in squash will give you such an appreciation for the vegetable. Pumpkin pie is great. Breads are nice. But really just eating roasted chunks of the stuff - there is nothing better. And it is not sticky-sweet like all of the popular American uses for pumpkin and squash. If you are going to take the time to cut and roast pumpkins savor and enjoy your efforts. You might never buy the canned purees again.

Happy fall! And happy squash picking! Now go out and buy yourselves a bag of polenta and have some fun.

Wednesday, October 8, 2014

Squash and Feta Tacos with Salsa Verde


On nights when I just want to disconnect from it all—whether it's a stressful day at work or family banter via text—I find that cooking really grounds me. The jazz goes on, the wine gets poured, the cutting board gets put on the counter and BAM! I'm in my happy place.

Cooking from scratch brings Charlie and I such joy. We live in such a fast-paced, technology-driven world. The art of making, using your hands, feeling the textures of food—these are the things that ground us. It's a reminder of who we are and where we are.

So let's talk Mexican Tortilla's, guys.

Vegan? Yes.

Gluten Free? Yes.

Are they difficult to make? No.

Seriously. Make tonight "taco night".

If you have corn flour and water—surprise!—you can make tortillas. It's a 2/2 ratio: 2 cups of corn flour (masa harina) to 2 cups of hot water. (I also added 1 tsp salt.)

1. Knead mixture into a ball
2. Let the dough sit for 30 minutes
3. Mold smaller balls from the rested dough
4. Press to form your tortilla (this part helps relieve office stress)
5. Toast on a skillet

The fact that these are so easy will make you never want to buy store bought again. Ever. And think of the economics: That one bag of masa makes a LOT of tortillas.


My farmers market (shoutout to DC's FreshFarm Markets) has some really great vendors. The stand where I like to buy most of produce from (Garner's Farms) has the coolest stuff. And organic, too! Plus they are just super nice people—always willing to answer questions that one might have. Last week, they had this basket of gorgeous squashes. People, we are talking magazine-cover type stuff. In the bag went two types: Kabocha (Charlie's favorite) and a Red Kuri (the color blew my mind—I had to have it).

If you have not cooked with either of these before, I highly recommend that you do. Acorn and Butternut are popular for a reason, but there are so many more types of squash to sample. The Red Kuri, in particular, had a very chestnut-like flavor. Who could say "no" to that? Move over, Butternut.

My taco filling was a mixture of feta cheese with the above squashes roasted. (You could easily replace this with avocado to keep it all vegan.)


Now let's talk Salsa Verde, guys. In fact, let's talk hot peppers. Scared? I know, me too. I was chicken to touch it and used a sandwich bag in lieu of gloves. Did it work? Yes—so you should try it too. What a difference from canned. They were fresh, smoky, and vibrant. I used half a Serrano, no seeds or ribs. (I told you I was chicken.) That amount provided just enough heat.

A friend of mine has recently been using cashews in what she cooks. I was inspired. Having cooked for my lactose-intolerant cousin, I have been educated on the power of cashews, and nuts in general. Using soaked cashews, I pureed this along with leeks and chard to make my Salsa. That's right: Chard. Chard is great and everything, but aren't you all tired of the tried-and-true sauté with garlic and oil? I know I am. This was a super cool way to use the vegetable, keep it raw, and not know that you're eating leafy greens. Trust me. You're vegetable-phobic friends will never know.

Salsa Verde: Puree 1/2 bunch of de-ribbed Swiss Chard with 2 Tbs leeks (washed and chopped), 1-2 tsp cumin, 2 tsp salt, 1/4 tsp oregano, and 1/2 cup of cashews (soaked in hot water for 30 minutes). It's delicious and it's vegan. Again, you're friends will never know.

And that's how I spent my glamorous evening off in the city: cooking. Sometimes pressing out a batch of tortillas (along with some tunes and wine) is all you need to wind down from the day's stresses.


Monday, August 26, 2013

Socca


Hailing from Nice, France, socca is a hidden gem for those on a gluten-free (and dairy-free) diet. I cannot imagine a better project for the Piccolo Gourmet. Socca is a cracker-like crepe made from gram (chickpea) flour. The Italians from Pisa and Genoa have their version as well, farinata, and is made in a similar way.

Our research led us to find that, in France, they are usually cut into triangles and served plain. In certain parts of Tuscany, Italians add toppings like a focaccia. Tonight, I tried both ways. Many thanks to David Lebovitz's Parisian blog for providing the recipe. Gluten-free vegans rejoice!

Socca or Farinata
1 cup gram flour
1 cup water
1.5 TSP of olive oil
1/2 tsp sea salt
some crushed black pepper

1. Blend all ingredients into a bowl and let rest for 30-45 mins. (I went for a jog and came back.)

2. Preheat broiler and place a non-stick cookie sheet (with a lip) in the oven to pre-heat for 10 minutes.

3. Pour batter onto the hot sheet and (using a mitt) roll dough around to coat the surface as evenly as possible.

4. Place under the broiler until it has blistered in spots and set.

5. Cut into squares, triangles, whatever, and enjoy warm.

The socca were sooo good plain with a glass of white wine. Also good with toppings, though try to stay on the lighter side. I topped my farinata with a roasted tomato slice, fresh chopped basil, and sliced olives (see photograph). The tomato was very heavy for such a delicate base. It held up fine, but something lighter (like caramelized onion slices or just some chopped herbs) would have been preferable.

The dish is so simple to execute. Weeknight fare for sure. However, like most gluten-free dishes, it requires some trial and error before hand. Did it turn out edible? Absolutely. I'm bringing leftovers to snack on tomorrow at work. However, I would love to squeeze in a couple of more trials before my cousin comes over next week. (He has gluten and lactose allergies, so this dish is PERFECT for him.) A second post with further experiments are in order, so keep your eyes peeled. Happy cooking!

Sunday, May 5, 2013

Savory Tarts


Tomato-Herb Galette


Summer Squash Galette


Sweet Potato-Spinach-Goat Cheese Tart


Spring is here, which means chilled white wine, dining al fresco, and time spent in the sunshine. Light meals are on the horizon. And the French know how to cook light. Well, just filling enough, let's say. Vegetarianism, I have written before, is challenging when dealing with French cuisine. It is not a secret that I have been on a tart kick, perhaps because they are so versatile. And easy. Finally I am writing on this trend in our kitchen.

In past weeks, I had made a type of tart which almost mimics a custard. The dough is extremely wet, however, when poured into a smoking hot dish, it puffs up, and cooks quickly. The other type that I had become an expert at making is a galette. The dough is presented in an extremely rustic way. Mistakes are ok. In fact, they might even make your galette look better. Both dishes are versatile, easy to make, and can be altered to suit your taste. 

I must give credit where credit is due. I used this dough recipe (http://www.tarteletteblog.com/2012/03/recipe-gluten-free-heirloom-tomato.html). Um, fabulous. Whole wheat flour was added, though. My proportions were 1 cup white, 1/4 cup whole wheat. My tomato tart was seasoned with sea salt, garlic, and basil. 

Another challenge is making this a complete meal—and at the current moment I have no protein in this tart. Plus, I wanted this galette to be cheese free. My answer was adding legumes. I added shell beans that I soaked and cooked earlier to a puree of sauteed farmer's market vegetables. It looked like a Mediterranean hummus, but it served as a great base. All liquid from the tomato would be caught in this spread—It served a dual purpose. Protection and nutrients.


Tomato-Herb Galette (Serves 3-4)
Slice and sauté 1/2 large onion in olive oil with 4 garlic loves (chopped). Add a nice handful of washed, de-stemmed chard. Add 2 Tsp. of dried basil (don't forget to grind these dried herbs in between your palms to extract the oils and deepen the flavor.) Add a pinch of chili flakes and salt to taste. Puree this with 1 cup of pre-cooked shell beans (or use canned).

Spread the puree on the base of your galette. Fan out thinly sliced plum tomatoes (about 3) and fool up the sides of your galette dough. Cook for 50 mins. at 350. Broil on low for 10 minutes but keep a watchful eye that this does not burn. You want your tomato edges to darken and your dough to toast. Cool on a rack and sprinkle liberally with coarse sea salt. 

Other notes on past tarts can be read in posts earlier last month. Making this one again for sure. Enjoy and have fun!


Monday, April 22, 2013

Tarte de basilic et légumes grillés

 Slice of Tarte

In the pan

More notes on this to come, but we wanted to share some visuals in the meantime. I am extremely confident in the making of this dough. It is the filling(s) that I still need practice with. However, if you have 45 minutes and some pantry staples, a savory French tarte is an easy (yes, easy) light dinner. 

Monday, April 15, 2013

Tarte aux patates douces et fromage de chèvre


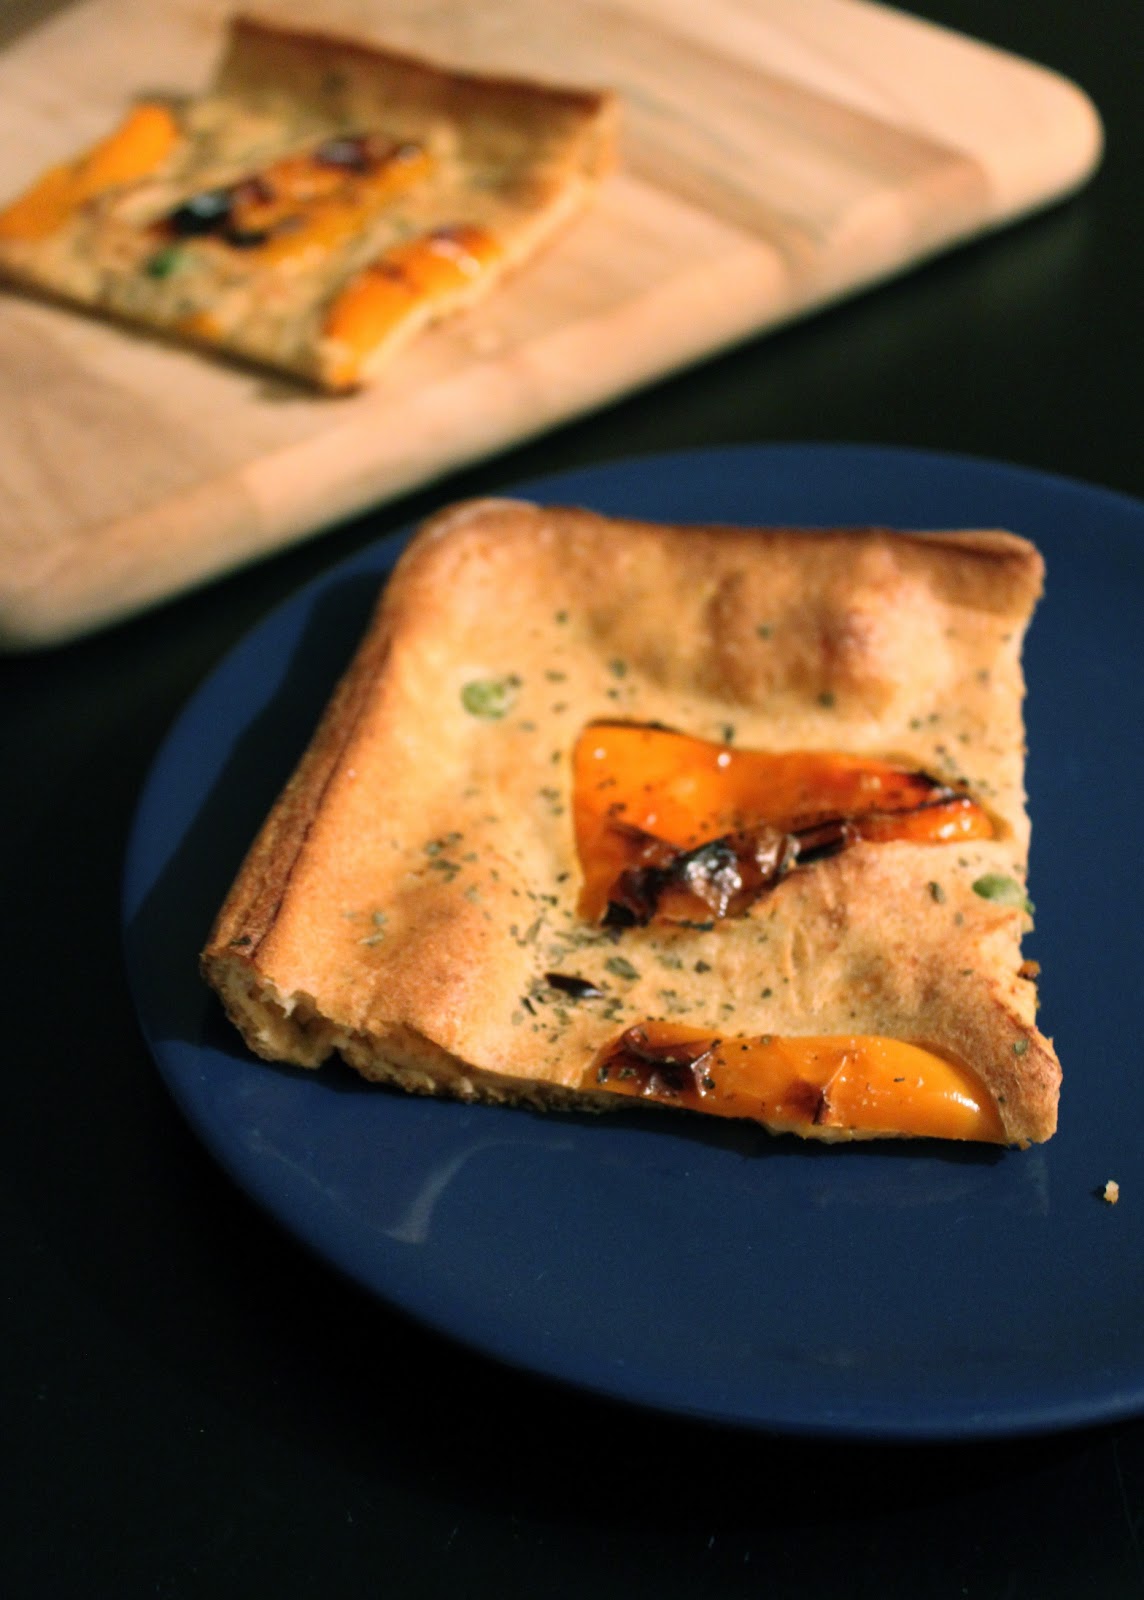
The Piccolo Gourmet had a great time tonight. This bread was so much fun to make that we might try it again tomorrow. This tarte base is only three ingredients: 3 eggs, 1-1/2 cups flour, and 1-1/2 cups milk. To it, you could add some salt, some fresh herbs, whatever! The trick is to oil your pan extremely well and to have it heat in the oven on its own for 10 minutes at 425 degrees. When your pan is smoking hot, add your batter and whatever toppings you wish. We were hesitant adding our toppings to such a wet, raw batter, but everything sets up beautifully! We won't tell you what kind of tarte to create—the possibilities are endless. Be creative! Our crust tonight was a combination of Whole Wheat and All-Purpose flours. Though the majority of our dish consisted of sweet potatoes and goat cheese, we also included spinach and caramelized onion. We seasoned it with garlic, sage, sea salt, and crushed black pepper. If you have all your ingredients ready to go, this dinner can be made in 45 minutes. An easy, healthy, after-work treat.

Tuesday, April 9, 2013

Torre de Batata


April has been colder than we would have hoped. Despite the chill, we decided to start Spring with a salad—but a roasted vegetable salad instead of jumping into the lettuce catagory. There will be plenty of time for that later. Besides, we had some great surprises show up in our produce delivery this past week!

It is no secret that The Piccolo Gourmet loves to roast vegetables. Inspired by our favorite local spot, we hope you enjoy this warm, Mexican-influenced salad.

This recipe is as delicious as it is foolproof. Big flavor with a minimal amount of prep time.

INGREDIENTS
2 sweet potatoes
1 bag of fresh brussel sprouts
1 cup of white (or black) beans
olive oil
sea salt
chipotle powder
ancho chili powders
goat cheese* (optional)

Peel and slice potatoes in 1/4 inch disks. Clean the brussel sprouts and slice in half. Toss the vegetables in olive oil and lay (cut-side down) on a foil-lined baking sheet. Roast in a 400 degree oven for 40 minutes. Remove from oven and toss liberally with sea salt. Lightly dust the vegetables with both chili powders (Ancho can be quite hot, so add this powder to your taste).

Lay one slice of potato on a plate and top with 2 or 3 of the brussel sprout halves. Continue adding layers until a mound is formed. Top with a spoonful of white beans and drizzle olive oil over the dish. Enjoy.

*note: I originally ate this without the cheese. I added a crumble of goat cheese on top to balance out the heat of the chili powder on my second helping. It tasted fabulous, (when is adding goat cheese a bad thing?) but, this can be easilly left out to keep the salad vegan. It is delicious either way.


Monday, April 8, 2013

Couscous Blanc


Oh, the mighty artichoke. I love you, artichoke, but you stress me out. Thank goodness Julia Child takes you step-by-step—she's a life saver. This is my third attempt at cooking artichokes.  Yes, I'm still intimidated. Yes, they are time-consuming. However, you feel proud of yourself when you are done. And, come on, who doesn't love a fresh artichoke? I'm home alone. This means more artichoke for me (and I can pig out all by myself). 

Oh yeah. That's happening. 

And sorry, I'm not going to tell you how to cook artichokes because there are many others that could explain the process FAR BETTER than I. You should see my kitchen—it's a complete mess. I am obviously not a pro. The only advice I can give you is: Be prepared to work. Leave time for yourself, be patient, and try to enjoy the experience. 


Coincidentally, most of the items I set out to cook with tonight were "white" in color: White mushrooms, white beans, white wine. Thus, "Couscous Blanc" was created. The wine I had on hand was Spanish (shocking, I know), and I was referencing Julia Child's Mastering the Art of French Cooking. The result was a mediterranean-inspired dish combining Spanish and French cuisines. 


After my meal, I wrote some notes. I liked what I made, but it needs some work. Or maybe just more salt. Next time, I am going to add more oil and: 1.) finish with fresh squeezed lemon juice or 2.) add a some cheese (crumbled chèvre or shavings of queso de cabra borracha). Perhaps both. 

MATERIALS
1 cup of pre-soaked, pre-cooked white beans
2 globe artichokes
2 glasses of white wine (I used a 2011 Garnacha Blanca)
5 garlic cloves (2 whole, 3 sliced)
1 Tbsp of each dried herb: thyme, basil, sage
1/2 of a medium-sized onion
1 pinch of saffron
8 oz. organic white mushrooms (cleaned and sliced)
3 Tbs. minced fresh parsley
1 cup couscous (I used Red Mill brand)
olive oil (don't be shy)
sea salt (don't be shy)
cracked black peper

INSTRUCTIONS
Steam the trimmed and cored artichokes with 2 inches of salted water and 1 glass of white wine. Add 2 whole cloves of garlic and a bay leaf for aromatics. Steam for 40 minutes. Personally, I felt that this was too long of a time. Try 25 and check for doneness. 

While the artichokes are cooking, sauté the onion with a pinch of sea salt in olive oil. Once this is caramelized, add your garlic and the other glass of white wine. Let this simmer and cook down. When most of the alcohol has burned off, add your herbs, saffron, and mushrooms. Once the mushrooms have let out some of their juices, turn off the heat. Add the beans, cover with a lid, and let the mixture rest.

Reserve 1-1/2 cups of the artichoke cooking water. Keep the aromatics in the water. Heat this back up to a boil and add your couscous. Take off off the heat, cover with a lid, and wait 5 minutes. When the couscous has absorbed all of the liquid, remove the bay leaf. Add the mushroom mixture to the couscous. Test for salt and add freshly ground black (or white) pepper. Sprinkle with the fresh, chopped parsley, and stir.  Let the leaves wilt with the steam of the dish. Serve.

Saturday, March 23, 2013

Stuffed Pepper Hors d'oeuvre


The Piccolo Gourmet returns to its roots and created something Euro-Mediterranean. 

Our CSA box this week was packed with goodies: Kale, Petite Sweet Peppers, and the list goes on! Because of this, we rapidly had to use up vegetables we bought earlier in the week. (As well as our fresh cheeses that only have a 3-4 day shelf life.) What to do?

The petite peppers reminded me of when I was living in Spain. A popular tapa we had was pimientos de padrón, which were char-blistered peppers brushed with olive oil and sea salt. I don't drink beer, but on the rare occasions that I did, this was a great paring. At my friend's house, we used to do a variation: We sliced pieces of manchego, stuffed the pepper, and then charred the peppers on his grill. 

Tonight, however, the cheeses we had on hand were French, not Spanish. But why not try a French variation on my original recipe? I made a quick mirepoix (how French, right?) of the carrots, celery, and shallot that were low on shelf life. To this, I added our reminder of fresh spinach to wilt. When this was all done, I chopped the mixture finely in a food processor. This was combined with the remainder of my Fromage Blanc to make a stuffing similar in looks to a New York bagel spread.

Put the de-seeded, stuffed peppers on a foiled cookie sheet. Drizzle lightly with some olive oil and flip to coat. Place this under your broiler for 10 minutes and let the blistering begin. Remove from the oven when the dark char-marks begin to form. Sprinkle with sea salt and let it rest 5 minutes before serving. 

Spanish tapa meets French hors d'oeuvre: Bon Appétit and Buen Provecho from the Piccolo Gourmet!

Wednesday, March 20, 2013

Wontons "Our Way"


We have become a regulars at Cowgirl Creamery, a local cheese shop here in Washington, DC. To say the word "love" would be an understatement. We adore that place—and the staff is friendly and helpful. Their "Fromage Blanc" is a beautiful cow's milk cheese that we have become enamored with. It is not an Italian ricotta cheese, nor is it an American cream cheese—however—the texture is a marriage of both. It is tangy, creamy, and versatile. This, in itself, would be a delicious wonton filling. 

Speaking of wontons, this is what we experimented again with tonight. Wonton wrappers are blank canvases. They can hold anything. We mixed our beloved Fromage Blanc with wilted spinach, sea salt, and caramelized onions.

Baked wontons are just as crispy as fried wontons. This is great for all you calorie-counters out there, and there is no messy frying oil. Your stuffed creation is bite-size, crispy, and a fun change-of-pace from your normal dinner. Just pre-heat your oven to 350F and bake your wontons for 15 minutes. If you make your filling the night before, dinner can be virtually effortless and ready in less than 30 minutes.

On a personal note, standing at your kitchen counter while stuffing (and folding) wontons is a very calming action. After an extremely busy day at the office, this was a surprising way to relax. I was exhausted when I arrived home and nearly ordered take-out.  I'm glad that we didn't. I was even more glad when I bit into that warm, crunchy wonton. What's our next wonton filling? Literally—food for thought.


Sunday, September 30, 2012

Baked Wontons

Coconut-Peanut Dipping Sauce with Cucumbers


Fried Tofu Squares (to also dip in the Peanut Sauce)


Vegetable Soup with Noodles and Hot Chili Powder


Wontons


Asian food is a new direction for The Piccolo Gourmet. It's not that we don't like this type of food—we just never think to make it, really. And yes, I will be honest, it intimidates me a little. "Stick with what you know", I told myself, "And stick to items with which you are comfortable". The majority of our education and experience has been with Western European cuisine, so why stray from the path? Let's try to make something cross-cultural—fusion—as people like to call it. And that is exactly what we did.


Wonton wrappers: Cute, slimy, fun. You can fill wontons with whatever you like, which is the best part of making your own dumplings. I filled ours with Neufchâtel, minced asparagus, yellow peppers, and a touch of pimentón. Other combinations that I had in my head were: goat cheese with pears, pimientos de pardron with manchego, fava (or white bean) puree with sea salt and herbs. I know, I know, the only Asian ingredient I used were wonton wrappers. But hey, use what you are comfortable with, right? 


I was cooking with friends and Jennifer, who is Korean, taught me that before I bake my wontons (which was what I did) to steam them first. Truth: My wontons came out kind of too crunchy, but not entirely inedible. (We did eat them all.) The steaming would have absolutely helped—great to know for next time—and, yes, there will be a next time.


MATERIALS:
4 oz Neufchâtel
1 cup Minced vegetables of your choice
1 heavy pinch of sea salt
1 dash of pimentón or smoked paprika
1 dash of dried thyme, oregano, garlic, or a mix of all three
1 pkg wonton wrappers


TECHNIQUE
1. Mix all your ingredients together
2. Dip entire wonton wrapper in water and cup this in your hand
3. Drop a small spoon of cheese mixture in the center of the wonton
4. Fold in edges and pinch together
5. Steam these for little bit (not sure how long Jennifer would recommend)
6. Bake in a preheated 350C oven on a greased sheet until golden on the edges, about 20 minutes.

7. EAT!!

The dinner was a full Asian-themed meal that we all shared family-style. We had Baked Vegetable-Cheese Wontons (obviously), Coconut-Peanut dipping sauce alongside Fried Tofu Squares and sliced Cucumbers, Spicy Vegetarian Noodle Soup, and Dessert Wontons that were stuffed with Nutella and Banana. Hmmm... on second thought, this might become a catagory in the future for the Piccolo Gourmet: Themed-Cooking with Friends. I guess you will have to check back in the future!

Sunday, September 9, 2012

Sweet Cheese Kugel


When the dough from a Börek doesn't work out, what do you do? You save the un-cooked portions, unravel them, use these pieces as noodles. Well, at least that what we decided to do. We made a sweet Noodle Kugel (the versions for this dish are in the hundreds, so pick which ever you find in a cookbook or online that strikes interest. We included the one we used at the bottom of this post JUST in case).

Kugel, a mixture of noodles, cheese and egg, hails from Eastern Europe, so we were staying in the same zone of the world as our project-gone-wrong-but-good-education Börek. Serve this with a Butter Lettuce, Pepper, and Cheese salad, and you have yourself a pretty awesome meal.

 
Butter Lettuce Salad

 
Sweet Cheese Kugel


Ingredients:
  • 16 ounces (400 gm) broad egg noodles, or saved pieces of unsuccessful Börek :-(
  • 4 Tbsp. (50 gm) butter, melted
  • 1 pound (500 gm) cottage cheese
  • 1 package Neufchatel cheese
  • 4 eggs, beaten
  • 1/2 cup sugar 
  • 2 Tbsp. vanilla extract
  • 1 1/2 cup crushed cornflakes (we used whole grain)
  • 2 tsp. cinnamon
  • 2 tsp. nutmeg
  • 1/4-1/2 cup sugar

Preparation:
1. Cook noodles in boiling water according to package direction. Drain and rinse with cold water.
2. In a large bowl, mix the noodles with the melted butter, cheeses, eggs, sugar and vanilla. 

3. Pour into a greased 9x13 inch pan. 

4. In a separate bowl, mix the cornflakes, cinnamon and sugar. Sprinkle the cornflake mixture on top of the noodle mixture. 


Saturday, September 8, 2012

Börek


Making the Dough 


Twisting the cheese-filled dough into a coil.


Bake and break apart to share.

Note: This was a trial and a recipe / technique will follow later in the future. This was extremely difficult to make in a small space and our dining room table (covered with a bedsheet) became our work space. Look for upcoming comments from Charlie -- he made lots of notes on his experiment, but doesn't feel comfortable yet with sharing a recipe. We will keep you posted! 


Tuesday, September 4, 2012

Salade de haricots au fromage de chèvre


I'll be the first to admit it: I'm on a French kick. And I have no idea what initiated this. All I know is that if I have another lettuce-based salad, this vegetarian is going to go off the deep end. I just could not take it any more.

French-style green beans, or hericot verts,  were on sale at the grocery. And they looked gorgeous. Luscious, if that's possible. I walked by, they gave me a wink, and said "Hubba, hubba. Où allez-vous, monsieur"? Into the basket they went.

With Mastering the Art of French Cooking in storage (...psst! The Piccolo Gourmet has moved [!] ), I had to turn to another source. I saw a recipe that was simple enough. And it was. And equally as delicious. It also required 2 of my favorite foods (goat cheese and lima beans), so I was sold.

Steam fresh green beans (12 oz. or so) and set aside. Boil frozen artichoke hearts and lima beans (your desired amount; I used 5 or 6 ounces of each) in salted water . Drain and set aside. Chop up a large handful of fresh herbs and throw them in a large bowl. Add a heavy dash of olive oil, all of your vegetables, and stir to coat. Add salt and a dash of white wine vinegar. Dollop your servings with goat cheese or  fromage de chèvre and a heavy crush of black peppercorns.

Done. And a healthy, quick dinner for after work. Quelle merveille!

Soupe aux tomates de style portugais


The air conditioning is slowly rising from only one of the three vents in our rented apartment. It is 80F outside with 80% humidity. We only have one small fan spinning at its maximum speed. Case in point: It is hot. 

Sticky, sweaty hot.   

My mind went directly to gazpacho for this afternoon's kitchen project, but the hidden goal behind making this meal was that I wanted to use up what was in the fridge. And summer always exhausts me of salads. I needed to make... soup. Hot. Soup. 

Dear Reader, as you are well aware, this is not our first time making something completely ridiculous when the conditions are severe. One might recall the post when I baked a bread in 95 degree weather. Or when Charlie made impromptu pasta from scratch when...well, we were out of boxed pasta and the store was closed. If we want to do something we just do it.

The fridge was bursting with leftover "dippables" from the  hummus I had made the week before. Celery stalks. Carrot sticks. Um, hello? Chop these guys together with some onion and you have instant mirepoix.  Combine this with the forgotten fresh herbs in the fridge and BAM! All arrows were pointing to France. OK. A French vegetable-based soup it was. But wait! I have garlic. And spinach. And limas. Garlic, spinach, and limas are a classic Portuguese combination. OK, so my brain was ending the fiasco here: A Portuguese-inspired, French-style soup. Phew. This will be a fun, creative time in the kitchen. All of a sudden, I don't feel so hot. I guess I'm just excited.

Before I start listing ingredients, I cannot stress this enough, people: Use clean water to make any soup, bean, or rice dish. Leave the tap to water your plants with. I learned this trick while living in Spain and it really does make a difference. Either use filtered water (Brita, Pür, or the like), or buy a bottle of mineral water.


MATERIALS
5 garlic cloves
Half a bottle of young red wine (ex. a French Boujoulais or a Portuguese Douro)
Fresh herbs de provence, off-the-stalk (and minced), about 2-3 Tbsps.
1 large onion
4-5 celery stalks (and their leaves)
4-5 large carrots
1/2 - 1 lb. cherry tomatoes
large can of crushed tomatoes
2 large red bell peppers
5-9 oz. of spinach and/or rocket
8-9 oz. of organic, frozen lima beans
1/2 -3/4 liter of mineral water
1 tsp butter
4 bay leaves
olive oil
sea salt
Food Processor

- Serves 6  -


WHAT TO DO:
Using my food processor made this whole experiment easier and faster. Especially when your small kitchen can barely has the surface area for a cutting board. After you rough chop all the above vegetables, simply chop them finely in the food processor, but seperately. These need to go into the pot (with oil and butter) in a specific order.

1. Onion. Sautée lightly then add
2. Carrots and
4. Red Peppers and
4. Celery and let them cook together with a liberal dash of salt.

When the liquid starts to get released from this mix, add the garlic (mince it), and herbs (de-stem and give these guys a whirl in the processor as well.) 

Turn up the heat and add your wine. Let it reduce almost completely. Then you add your can of crushed tomatoes and processed greens.

While this is in your pan, puree your cherry tomatoes and add those as well. Cover, and let it come to a boil.

When the pot is gently bubbling, add your limas. Cover and let simmer for 15 minutes. When the beans are done, so is the soup. Test for salt.  Enjoy.


Wednesday, July 18, 2012

Sangria de Cádiz

Like other popular summer cocktails in Europe (example: the Italian "spritz"), citrus is the star when making authentic Spanish sangria. The recipe for sangria changes depending upon where one has it in Spain. The commonality, however, is that the added fruit was always oranges. And rightfully so. Valencia oranges are local, super-saturated with juice, and could be mistaken for candy by the sweetness. Apples are a popular  "sangria fruit" in the U.S., however very few apples found their way into my glass in Spain. Culture shock. Perhaps that is purely an American trait?


In Madrid, brandy was added (the bartenders also told me), and gives a very subtle depth of flavor. Thinly-sliced lemon rings clung to the perimeters of  glass pitchers. These were works of art and images I will always remember: Chunky glass vessels brimming with burgundy sangria but contrasted with vibrant yellow rings. Perhaps it is the "artist" in me, but I found this color-combination quite striking. It was like a having a sophisticated "Tinto de Verano" (a popular spritzer of lemon soda and red wine...Charlie's addiction).

Further south, in Cádiz, I detected brandy again ...and with (surprise!) oranges. However, cinnamon was added, and was (perhaps) the best sangria I have ever had. The combination was beautiful. The addition of cinnamon might be a bit scary, but do try it. It is a fantastic surprise to your taste buds. This I found to be the best recipe ...and so distinctly Spanish.

Picking a wine is also very important. Don't just buy "cheap" red wine. Similar to when you cook with wine, you want to add one that you like to drink on its own. You want to avoid something heavy like a Tempranillo. The lighter the better. Try a table wine like a young Cabernet or a Douro from Portugal. These are fairly easy to find. If you can get your hands on a pure, bare-bones, Spanish vino tinto, get it! The label will simply say "vino tinto" or "vino de la mesa". 

Ingredients:
1 single (mini) bottle of brandy
1 bottle of red table wine
Cinnamon sticks (3-4)
(depending upon taste) one-fourth to one-third of a bottle of Lemon soda (Sprite is fine. If you have access to authentic Spanish exports, buy a bottle of "Gaseosa" soda or "Kas" limón) 
1 lemon, sliced
2-3 oranges, sliced


Mix all ingredients (including the cinnamon sticks) in a pitcher. Squeeze some of your citrus juice into the mix as well. Try to mix well enough to get some specks of cinnamon off the stick and into your mixture. Serve in a glass or tumbler with a cinnamon stick as garnish. ¡Qué rico!

Wednesday, July 4, 2012

Pão caseiro integral


I realize that nobody in their right mind would dare turn on their oven in hot, humid, 80F weather. "The norm" never affected us at The Piccolo Gourmet. When we want to bake,  darn it, we are going to bake. What better way to celebrate America's birthday than to cook something from another country? Seriously. The United States is comprised of children from countless generations of immigrants. I find nothing wrong with baking Portuguese bread on the 4th of July; it is (perhaps) just as patriotic as baking a southern Pecan Pie. In addition, at this time last year, I was roaming the streets of Lisboa... and probably with a slice of pão integral in my bag.

Was it scary attempting this without the help of Charlie? Absolutely. He is the chemist of the family, and knows the science of baking quite well. Our friend Jenny (a professional baker) was also not at my side, which made me sweat even more. However, the trial went well, and the secret that I had found (as with all ethnic cooking) was "time". Oh, and add "patience" to the list as well.

I went for a run while my bread was proofing for the second time (my curiosity had to stop checking on the rising of the dough every 5 miliseconds).  While jogging I thought of my Dad's mom,  mi abuela Chilena. She mothered sixteen children and baked fresh bread every single day. Her kitchen was about the size of ours, and in the summer months, the temperature outside today was not that far off from the campo of Santiago de Chile. How, I wonder, did my grandma do it? Where did she learn how to bake? From her mom--my great-grandmother? These are questions that I am sure others ask of their families and man, I wish I knew the answer!

There are a slough of recipes (receitas) for baking breads from Portugal. This is a culture that is infamous for their mastery of baking. I will refrain from adding the recipe that I used, as it is one of several versions. Simply choose which works best for you. My favorite Portuguese breads (Broa de Milho and Pão da Avó) I will have to try making later when I have the proper flours (and when it is not the middle of summer). For now, pão integral (or whole wheat bread) will do, and trust me, it did. A slice of warm, freshly baked bread topped with olive oil and salt? There is not much else that can get better than that. Happy Independence Day, America. And to all the "Silva"s that I met a year ago, obrigado por essas ótimas lembranças!


Tuesday, June 26, 2012

Aperitivo

Tomato with Spring Pea-Mint-Feta Puree


 Croquetas de Espinaca


Several countries around the globe have a name for small plates before one's evening meal. Greece has mezzes. Spain has tapas. Italy has aperitivo. These plates are meant to be shared, and usually are never too heavy. What better way to start summer than a plate of small bites made from local produce? 

In Italian bars (specifically in Milano),  aperitivo is common and free as long as you purchase a drink. This is also a great travel tip. You are going to want a glass of wine at happy hour,  right? You're on vacation! In that case,  sit at a bar, take a drink, and enjoy a "free" dinner while you are at it. You serve yourself and can take as much as you wish. 

Tonight I could not make up my mind on what to make. Don't get me wrong, I love salads in summer, but if I have another bowl of spring mix I just might go bonkers. While reading Bon Appétit magazine today, I saw a recipe for Mint, Parmesan, and Pea puree. Sounded fantastic. One problem: I only had goat cheese and feta in the house. (How Greek, right?) I figured Parmesan is somewhat salty, so let's swap it for feta. Of course I forgot the recipe at work, but how hard could this be? I pureed about 10 ounces of spring peas with a big handful of mint. After adding a dash of salt (for good measure) I gave the processor another whirl. Tasted awesome. Like summer just exploded in your mouth. Trying to cut down on carbs is tough, so I resisted the temptation of grabbing the crackers in the pantry. Instead, I sliced a tomato and stuffed it with the puree and feta. De-lish. But crackers would have been even better!

Perhaps it is because Spain has been on my brain recently (this month is the 1-year anniversary of my returning to the US), but I wanted to eat croquetas just as bad as I wanted to taste those darn peas with mint. Lo que sea, as we say in Spain, whatever. I simply made both. I have taken a stab at making these spinach croquettes in the past, but did not have the energy to even take a look at past posts on my own blog! Having just made the pea puree, I figured why not just chop everything together and throw it in the oven. You know what? It worked. I love it when that happens. 

One of the best things about these two aperitivo dishes is that the materials are minimal. Fresh, simple ingredients always make the best-tasting food. Have a go at these, and trust me, both couldn't be easier to make. Happy summer!

SPRING PEA PUREE
Handful of fresh mint
10-12 oz. of frozen spring peas or blanched fresh ones
1/4 cup feta cheese
sea salt
dash of olive oil

PROCESS
1. Puree
2. Serve with feta on crackers and/or sliced tomato 

CROQUETAS
10-12 oz. frozen spinach or 1 bunch of spinach, chopped 
1/2 large onion
1/2 cup of roasted, salted almonds
a couple ounces of the goat cheese of your choice (I used Portuguese Queijo de Castelo Branco)
sea salt
Spanish pimentón or smoked paprika

PROCESS
1. In a food processor, grind the almonds into a fine meal.
2. Sautee the spinach with the onion, both finely chopped. 
3. Add salt, pimentón, and let cool.
4. In a bowl, roll your crumbled goat cheese pieces in the almond meal.
5. Add the cooled vegetables and stir well.
6. Form into patties and bake at 350 for 20-30 minutes. 
7. While warm, sprinkle with an extra dash of salt and pimentón. Serve warm.


Monday, June 18, 2012

French-Inspired Vegetable Soup


We entertained guests last weekend. Our New York City readers (in particular) know the amount of effort this takes: Sightseeing, museum-hopping, souvenir shopping… It is always fun, but it is tough to cram Manhattan in a mere three days. Some might say "exhausting"!

When the sun started to set on Sunday evening, time was all mine once again. To the cutting board I went. I had no energy to grocery shop, but to stand by my sink in pajamas and chop veggies? Yes. This I could do. When all one wants to do is sit on the couch and call for take-out, even the most amateur home cook will try to  gather enough energy to make the smallest culinary effort. At least I think so.

"No energy" (to us at the Piccolo Gourmet) means "soup". Chop, throw in pot, season, done. The fridge was bare, to say the least, but the produce left over from last week was still (somewhat) plentiful. To throw all these items in a pot, warmly called "Fridge Soup", was the decision for a quiet dinner. And you know what? It was delicious. I would never blog something from an exhausted Sunday evening unless I thought it was worth the effort in re-creating. The secret ingredient here is the wine, at least we think so. Julia Child always added a splash or two to her soups. Why mess with the pros, right? Thinking about her, and French soups in particular, I picked out Julia's usual "go-to" herbs (marjoram, tarragon). It was the right decision. And especially since I had a touch of white wine left over from Friday.

(Serves 2)
Ingredients:
4 stalks of celery with leaves
1 small onion
1 bunch of carrots (6-7 medium-sized carrots)
1 red pepper
1 glass of white wine
1-2 large tablespoons of garlic paste (found in most groceries)
1 tablespoon of each: dried marjoram, tarragon, coriander
sea salt
good olive oil

Seriously, this could not be easier.
1. Chop all veggies.
2. Add olive oil to a pot and add your vegetables. After a few minutes, after the vegetables are warmed, add the salt. This will help extract the water from the celery and onion.
3. Add the herbs and garlic.
4. When you start to smell the garlic cooking, add a full glass of white wine, and simmer the wine until the alcohol is burned off, and most of the liquid is gone.
5. Add water (2 cups or so), and puree with a hand blender.

Done.

Sunday, March 11, 2012

Yiyantes Plaki

My parents met on the steps of the Parthenon. Combine this with my university thesis in art history (and my addiction to olive oil), and some people might say that I have always wanted to go to Greece.  This is true. Bistro Parea is one of my favorite restaurants to share mezzes (Greek small plates, similar to Spanish tapas) in New York City. There is a mezze there which I adore: Giant Baked Beans. It arrives at your table gently bubbling, fresh from the oven.  As the steam drowsily rises from this dish, one can smell the scent of parsley and sweet tomato sauce. It is delicious. 
After some research, I found out the Greek name, Yiyantes (Giant Beans) Plaki (oven-baked), which Parea does not note on their menu. I was craving this all day, but a lazy Sunday doing laundry does not equal getting on the bus to the East Side. The solution? Let's try to make this at the Piccolo Gourmet, which (dare I say) turned out quite like the dish at Bistro Parea.
To start, what I like best about this dish is how fresh it is. I cannot emphasize this enough. It is not over seasoned, has minimal ingredients, and is truly delectable in its simplicity. Many recipes for this dish exist in cookbooks and online, but one recipe in particular resembled my memory of the restaurant. 
2 cans of Large Lima Beans or Giant White Beans (or use frozen)
1 small onion, minced
1 stalk of celery, finely minced
Handful of Fresh Parsley
5 cloves of Garlic, thinly sliced
2-3 cups Tomato Puree
olive oil
sea salt
tsp of sugar
The ingredients are simple. Constructing the dish is simple. It is a meal that just makes you feel warm and cozy all over. Mince the celery and onion. Slice the garlic. Put these three  items in a sauce pan with oil with a dash of salt and sauté. Add your fresh parsley and let the mixture simmer. Add the tomato and beans. Put in a pie dish or casserole pan and place in a 350 degree oven. After an hour, take the pan out and try to let it cool before digging in. Serve with a dash of freshly ground pepper and wedges of warm pita bread, if desired. I prefer just a fork.